The Deluxe Gag gets a new addon : the Deluxe Bridle !

It was a popular request, but also something I've been wanting to make for a while, and is aimed at all the ponygirls and boys out there who want to use their Deluxe Gags during their favorite activities !
Attention : it needs the Deluxe Gag to work, it does not do anything on its own !
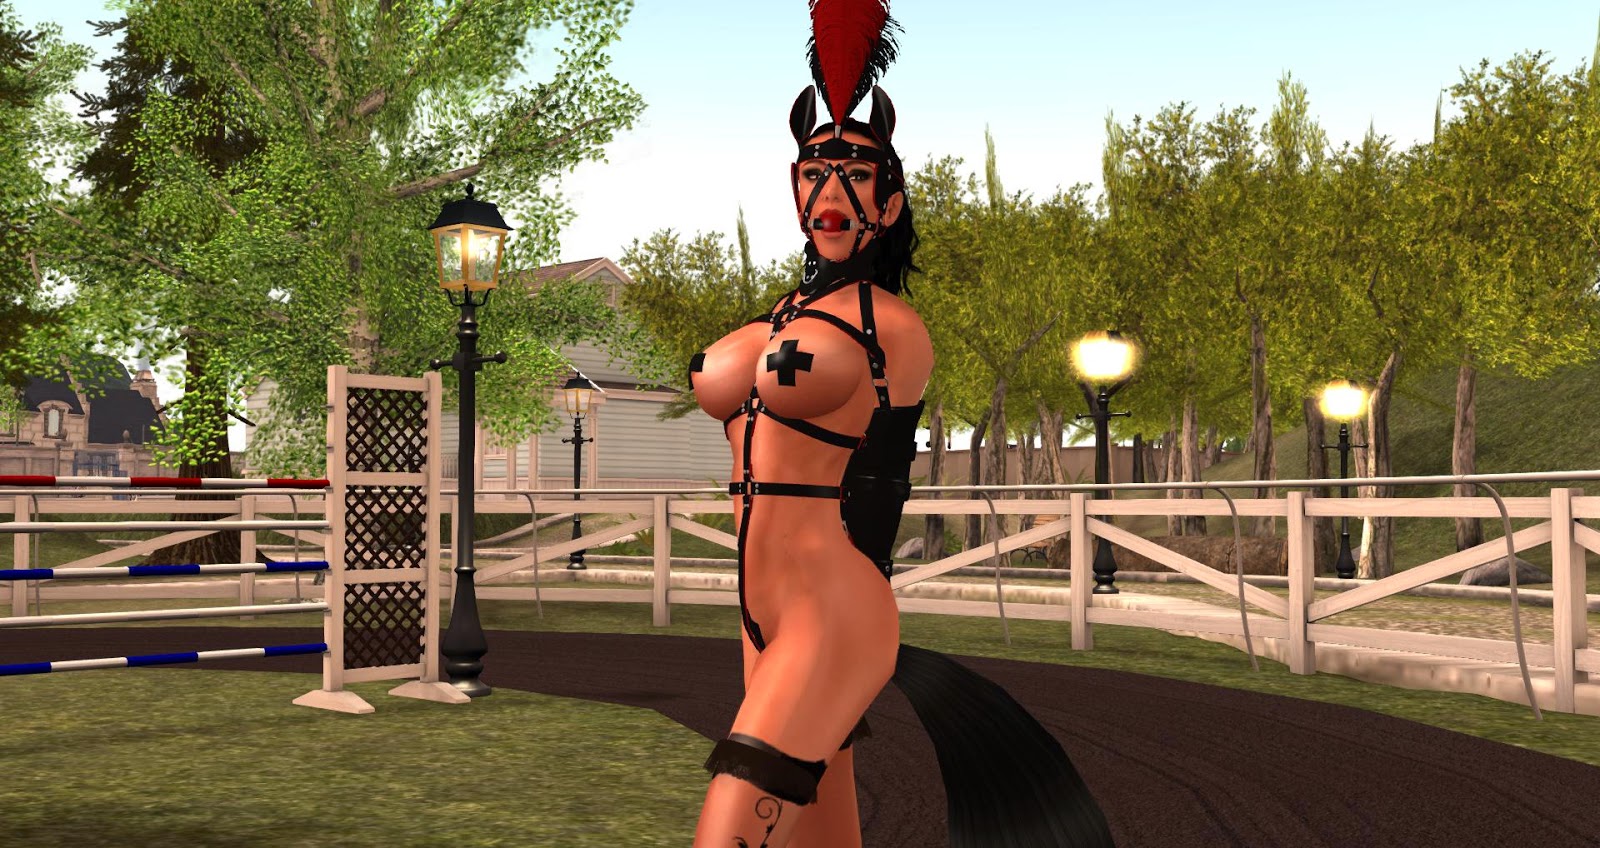
Designed to operate seamlessly with the Deluxe Gag, it is an addon to it in the same sense that the Police Elbow cuffs are an addon to the Police Handcuffs. At the bare minimum, it is a leather strap around the head, and another going down the jaw and under the chin :

The jaw straps providing more support for the strap of the gag (ring, ball, bit or ball-bit).
It has three options : pony ears, pony blinders, and pony plumes (a.k.a. "feathers").
The leather ears make the pony look a little more pet-like. Very cute !

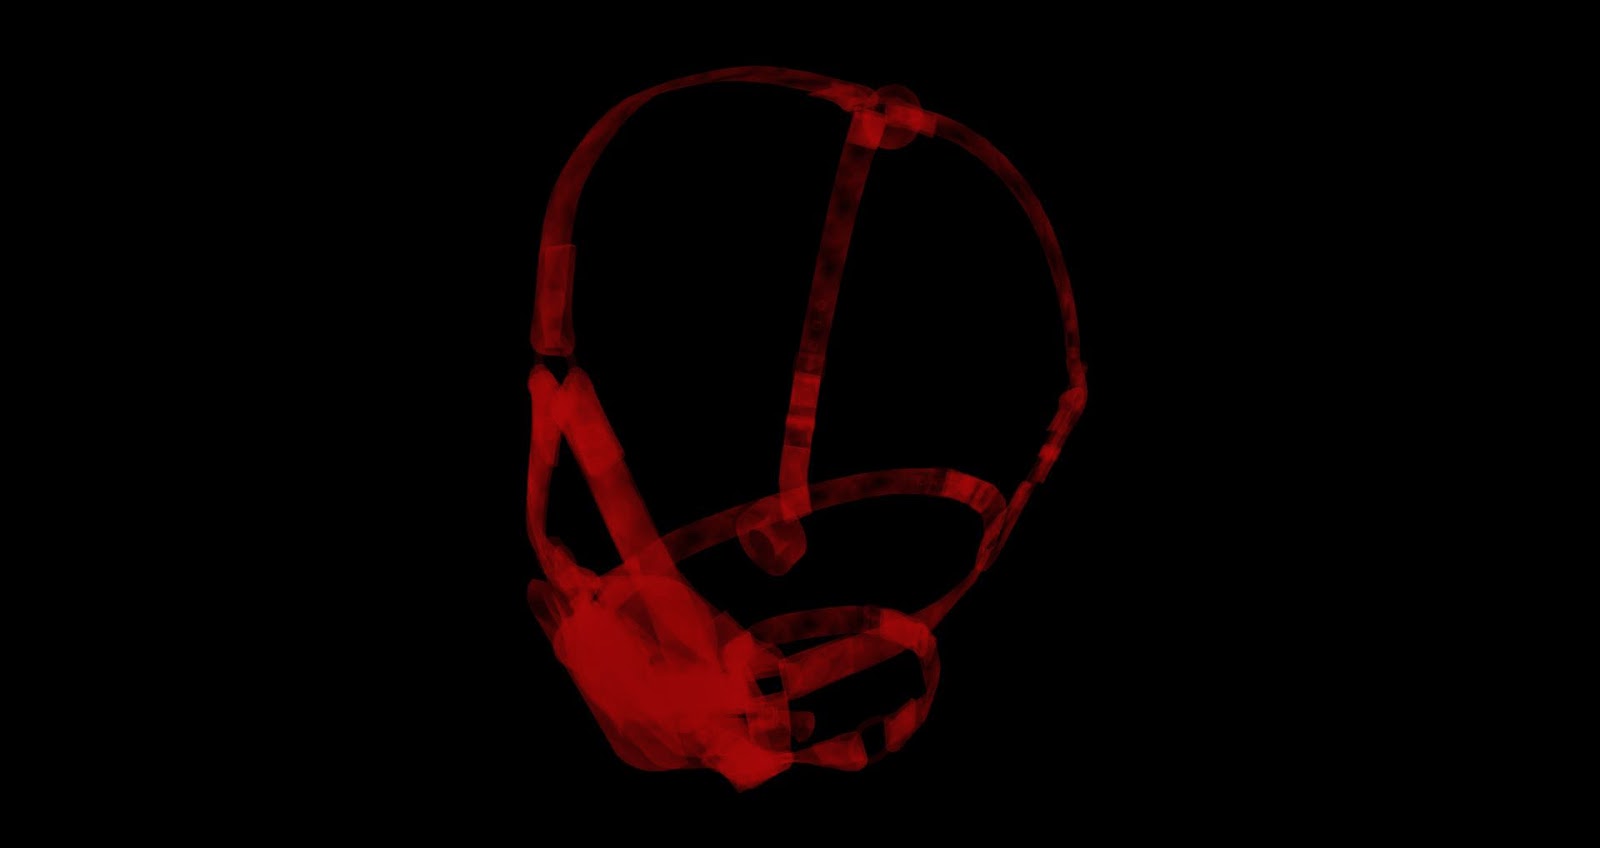
Every pony needs leather blinders, they are ideal for training :

What's more, when they are visible, the vision is restricted by the HUD blinders (provided in the box). Even better, the HUD, when visible, is locked (it cannot be detached) and non-editable (it cannot be resized or moved or made invisible). Of course, for those two features, a RLV-enabled viewer is required. Oh, and the HUD blinders change color and texture at the same time as the in-world blinders (those attached to the harness).

Finally, every show pony needs plumes. They are very useful during competitions, races etc, as they can change color at will :

And they're flexi !
As you can see, you can be a complete pony with the Deluxe Gag + its bridle addon. The Deluxe Blindfold is independent and may or may not be worn along with those two. Personally, I love blind pony training so I always wear all three parts at the same time.
The Deluxe Bridle uses the exact same textures and materials than the Deluxe Gag & Blindfold :

This means that when you use the HeadHarnessTex plugin on the Deluxe Gag, the Deluxe Bridle will change textures and tints as well. The blinders and ears are textured like the panel gag, while the front plume is textured like the ball gag and the back plume like the front faces of the leather straps. In other words, you can have your head gear colored in black and red with a red ballgag, like this :

... and texture the ball (and therefore front plume) white, by going to the HeadHarnessTex plugin of the gag, choosing "Sections", then "Ball" (it is on the second page), then "Tint", then "White" :


As you already know by having used the Deluxe Gag & Blindfold, you have many textures and tints at your disposal. When you change the texture or the tint of the gag, the bridle changes as well :

Rustic, old western style

Beloved

Oh, ha ha.

Arrrr ! Well, it sounds more like "mmmph !"
Used along with other RealRestraint items to complement your tack, the Deluxe Bridle is the ideal way to turn you into a very pretty pony !
How to install
To make your Deluxe Bridle operate with your Deluxe Gag, you must modify the contents of the Deluxe Gag a little :
1. Rez your Deluxe Gag on the ground in front of you. Attention, rezzing over a mesh object is problematic, try to rez over a prim or over terrain. The Deluxe Gag is invisible while unlocked, so you need to highlight invisible by pressing Ctrl-Alt-T :
2. Edit your Deluxe Gag by right-clicking on it, and selecting "Edit". Do NOT select "Open", as you might make a mistake when closing it :

3. Click on the Content tab of the window that shows :
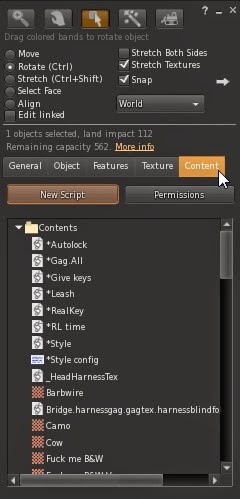
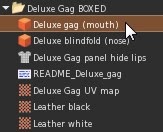
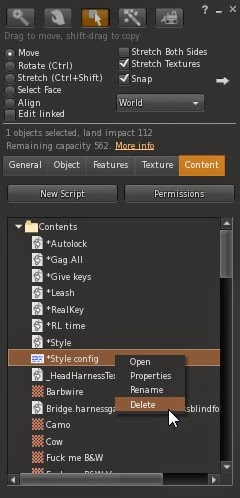
4. Delete the "*Style config" notecard by right-clicking on it and selecting "Delete". Do not delete anything else !
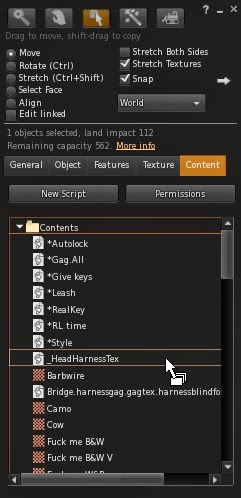
5. Look in the Deluxe Bridle folder in your inventory (don't close the Edit window), locate the following items : "*Style config", "Lockable_Master.harngag" and "Lockable_Token_Bridle" (that's two scripts and notecard). Select them, then drag and drop them into the Content tab of Deluxe Gag :
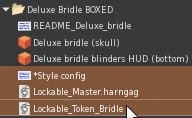
Wait a little and the inventory of the gag will update itself. Then you will be able to see the items you have added.

New "*Style config" notecard
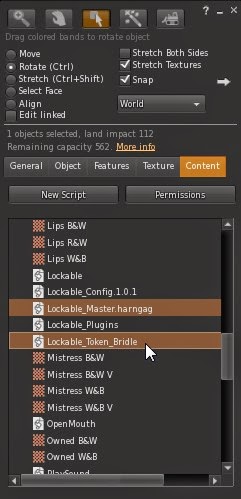
New "Lockable_Master.harngag" and "Lockable_Token_Bridle" scripts.
6. Your Deluxe Gag is ready to use with its Bridle. You can close the Edit window now and pick your Deluxe Gag up. Then wear it, wear the Deluxe Bridle and its Deluxe bridle blinders HUD, and you're ready !
What you have just done is activate the link between Deluxe Gag and the Deluxe Bridle, and make sure that when you update your Deluxe Gag, the updater will give you an updated Deluxe Bridle as well. I would have made a system to automate this installation (much like the RR updaters), but believe it or not, there would be even more room for error than to do it manually. At least here you know what you're doing.
How to use
To control the visibility of each feature (ears, blinders and plumes), all you have to do is click on your gag, go to the Style plugin, and you'll notice its menu has changed, due to the fact that you replace its configuration notecard during the installation procedure (see "How to install"). It now has three more toggles : "Plume", "Ears" and "Blinders". Of course, in order to have them show, you must not only activate them on this menu, but also have the gag locked. When the gag is unlocked, nothing shows at all. The Plume and the Ears are fashion accessories mostly, but the Blinders will hide and show the HUD as well, restricting your vision.

How to resize
Resizing the Deluxe Bridle is easy, because the straps are cut into separate mesh prims that are independent from each other. At first you'll just want to resize the whole object without bothering with each strap, by wearing it and having it locked one way or another (so it is visible), then right-clicking on it and selecting "Edit" on the context menu, exactly like in Step 2 of the installation procedure. You resize an object by holding Ctrl And Shift at the same time, and moving the handles that appear.
But if you really want perfection, you'll want to edit some of the straps individually. To do this, tick the "Edit Linked Parts" checkbox on the Edit window, and click on the part you want to resize.

The parts are :

Front plume, back plume

Left ear, right ear

Head strap

Forehead strap

Plume holder

Left blinder, right blinder

Upper left jaw, upper right jaw

Left holder, right holder

Chin strap
Of course you do not need to resize all of them one at a time. Only those you think could use some fitting.You can find the RealRestraint Deluxe Bridle addon in any of the RealRestraint vendors in-world, it is Modify, No-copy and Transfer, and costs L$200 :

One location where to find a RR vendor is in Pak :
http://maps.secondlife.com/secondlife/Pak/76/61/105
Have fun !
Marine

